Truth to be said, this one is quite simple and short, however I think someone might find it useful. It is part of IHRH series as it's focusing on IG veterans, once more! This time, how to make your very own strapped weapons, just like the single lasgun available both in FW upgrade pack and the Cadian CS. Without further ado, let's begin!
You're going to need:
- A lasgun arm (even if you're not doing a lasgun!), one of those "wide" ones, like below

- The weapon itself
- A little bit of green stuff
The first step is to cut out the lasgun, like shown below. It's easier to first cut out the weapon leaving the butt and cut it out later.
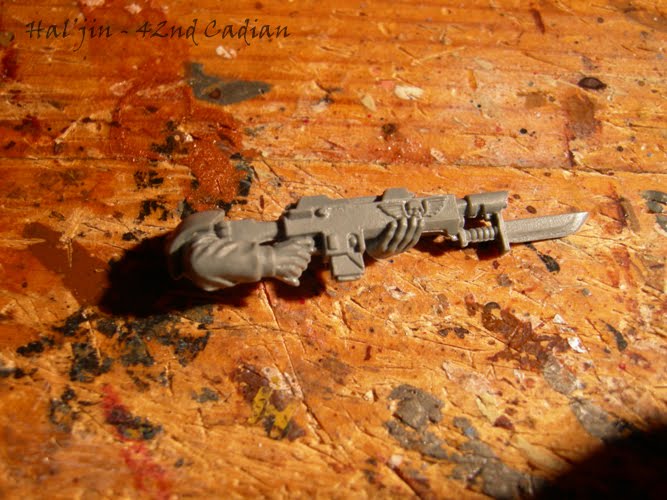
 Be careful not to damage the trigger finger! Now, take the weapon you want to fit. The picture shows a lasgun, and I'll go through with it, being the most popular weapon people will attach. My veteran however, is getting a shotgun.
Now you need to cut off a little bit of the back of the shoulder. The picture perhaps doesn't show exactly how, but it'll be clearer with the next.

Now attach the lasgun to the gap you've made. It is important to have the lasgun at the same level, or below, as the part of the arm that's attached to the model, else you will have problems attaching the arm. Make sure the lasgun "sinks" a little bit into the shoulder.

That's how it looks, with a shotgun, glued to the model. Glue yours too, it's very hard to do the next step without that!

Now roll a single strap from the green stuff and cut it in half.

Take one half and attach it first to the butt of the weapon (or wherever you feel it's best, but that's how FW has done it). You can make a small cut on it there, which, when painted metal, will server as a sort of a clasp. Then attach the other end just below the extended finger. That's why it was important not to damage it! Be extra careful now, we want a smooth strap there, no cuts!
 Do the same with the other half, but instead attach it above. If you are having problems attaching a smooth strap to the hand, use a little bit of superglue to make it stick, rather then pressing hard with your knife, tool, whatever.
 And that's it! Simple, eh? This is how a finished and almost-painted model looks like:
 And that's it! I hope you liked it and will find it useful. The IHRH column on the right will be updated for easy navigation to the article.
What will the future bring? First it's going to be the Numerical Methods test and Assembler Languages exam. Wish me luck!
But afterwards, there's one tutorial for Space Wolf players, a lot of new HQs for that, some tactical rambling... For the Guard there's Psyker Chimera, the 303rd and myself considering getting one of those new Leman Russ kits. See you soon!
Nice to see a new and worthfull (as usual) post again!
ReplyDeleteSome back strory:
I just found my old 3rd/4th edition IG army "under the roof" some months ago. Bought me the new codex and tried some 5th edition builds while checking th internet. I gladly found your blog and tons of valuable modeling tips for my new veteran squads.
So, in short: Keep on the great work!
It's always nice to see some new/additional ideas to the ones I already have.
Marco
I'm a big fan of this series; Nice to see a new post on it. I'm getting tired of the same old IG poses, and may have to have a go at sling-arming a weapon. Thanks for the ideas.
ReplyDeleteVery nice tutorial, very concise.
ReplyDeletevery cool thanks!
ReplyDeleteThat's a brilliant way of doing it - I wish I'd known that about 200 models ago!
ReplyDeleteOne question though, if I may: why is the top half of the strap slack? - surely that part ought to be taking the weight...?
I'm very interested in what you've got planned for the psykers' chimera...
Thanks guys! And here I was thinking it was a bit too short and simple!
ReplyDelete@Drax
Uh, you're right. I probably just screwed that up!Something to keep in mind for the future. As for the Chimera... Uh, I believe I did post the unpainted shot.. I hope it won't disappoint you, it isn't that much of a crazy conversion. ;)
thank you for sharing of some of the articles we read this one article is very interesting for us, i like it post.
ReplyDelete