Apologies for the delay on that one and general lack of updates. I've been busy with uni recently and add to that the Valks and Chimeras I've been trying to get my hands on... Good news is, they're all undercoated and I've started dabbling with a Valk. I also am halfway through that damn last Infantry Squad.
There is one more issue with this guide, my camera battery died in the very middle of taking pictures of GS work and since I wasn't home I wasn't able to charge it up and such was stuck with quickly curing GS. I decided to carry on not to waste it so unfortunately some part will be words only.
I was alson thinking quite long about what to write so that I do not repeat what has been said over the internet a hundred times. I probably still will repeat everything, but I'm intending to at least relay to you the basics of the conversion work I'm doing on nearly all Guardsmen of the 42nd. Let's get started then!
First of all what will you need to work with the Green Stuff.
- Some Green Stuff, duh

- A bowl or some other container of water

- A modelling knife of some sort

- I found out that a Swiss Army Knife is a great tool too

- And some workspare, preferable a large piece of relatively thick foil

Once you have all these you must first read these rules before you start, especially if this is your first time working with putty:
- Remember to keep your hands and tools wet at all times - it prevents the putty sticking to everything and most often doesn't let those pesky fingerprints appear on the things you do.
The alternative to water is cooking oil or vaseline. They both help to lubricate the putty so that it doesn't stick where you don't want it to.
- Epoxid putty is toxic - 'nuff said, really. Don't eat it, don't chew on it, even though it looks so colorful. You probably won't be hurt if you would touch your lips with dirty fingers, but I would reccoment washing your hands after finishing the job throughoutly.
- Patience is virtue - this one is hard, really is! There were countles cases where I just couldn't take it, when the thing I was making wouldn't stick on to the model and would gradually get ruined by attemps, when something didn't shape as I wanted to... The more nervous you are the worse the effect. Calm down and think of alternatives. Perhaps you can just let the piece cure and then use superglue to stick it onto the mini?
- Measure twice, cut once - as a rule of thumb measure roughly how much green stuff you will need to do the job. Then cut off half of that ammount. It actually works accurately 90% of times! And if it isn't enough there's never a problem of making more.
- Green is soft, blue is hard - it's a bit more advanced thing that I actually rarely take advantage of. Generally you should mix both the ingredients in a 1:1 ratio. If you add more green however you'll end up with softer, more malleable mass, while more blue will mean harder putty, which will keep its shape better.
- The middle is bad - unless you have bought a fresh blister of putty and it has been produced recently, the middle section, where two ingredients mix, will be useless. It will be thick, cured putty, which you won't be able to use, while it could create hard spots within the mass, ruining certain efforts. So cut out the middle section before starting the work!
- Anything is possible - well, almost. The only thing limiting the possible uses of putty is your imagination. Of course you'd rather not do large flat surfaces with it - you'd use plasticard for that.
- Anything can be a tool - literally everything. Sometimes I ended up grabbing the nearest object that I saw on the desk and it ended up being just the tool I need! I do not take responsibility however in case you decide to use your friend/relative/dog/cat as a sculpting tool.
And now, a couple of tutorials!
- Bandages
The thing I probably used the most. It's on nearly every Guardsmen in one form or another and it has been used on the veterans as well. Here are a couple examples. The mask itself actually isn't made that way, but some of them amongst many Guardsmen are, can't recall which exacly though, they look similar enough.


 So, how to do it? First of all, obviously, get some green stuff.
 Mix it up, remembering all the rules and once it's fully mixed (equal green color everywhere) roll a long "stick" out of it. It is advisable to use two solid flat surfaces, like old cd cases to roll it, it will guarantee a more even effect.

Once you've done this, flatten it, using two flat surfaces again. Press equally everywhere so that you achieve an equally flat effect. Remember to keep both surfaces lubricated!
 In case it isn't really even, use a very sharp and wet knife to cut straight lines and even out the shape.
 There, you've got a bandage ready! Now you can use it for whatever you want. For example roll it aroun the boots of a guardsmen:
 The thing is to use your fingers (wet!). It's imperative that you stick the bandage as close to the surface of the mini as possible, else you will end up with too big of a loop which will either look bad or fall of completely. Also remember not to press too hard with your finger or you'll have fingerprints left on the bandage!
In case that would happen there is one way to get rid of those. Get your finger wet and rub the area vigorously. Of course too hard and it might completely ruin the sculpt, that's why you have to be very careful!
In the end you might want to add some texture on the bandages, adding several small cuts along it. The final effect is something like this:

- Sash
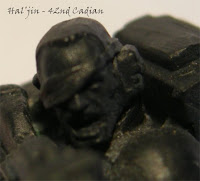
The other thing I'd like to show you is how to make a ceremonial sash, or at least it's end, like the one use below.
Yup, it is the finished overseer, will show it in more detail soon.

Firstly, make a bandage, but this time a bit thicker.

Cut it to preferred lenth and cut at least one edge to make sure it's perpendicular to the bandage. Now make two deep cuts across the bandage, closer to one edge, careful not to cut through it though!
 And here is the part when my camera died. However finishing it won't be hard. Simply make several shallow cuts along the shorter part. You can keep it that way, though you will add more details if you use the blunt side of the blade using it along on the longer part, making for folds in the cloth.
- Press molds
Theoretically an easy subject, but in practice it can cause issues if done wrong. You will need some additional things for this.
- Some cooking oil. A really little ammount. No, water will not suffice this time.

- An unused base. WFB square bases are great for this, though round do to. It is best however if the base is flat and has not "slot".

- The piece you want to copy!

Now remember you're not allowed to sell or share whatever you copy, that would be crossing GWs IPs. Also keep in mind that GS molds make for quite expensive ones. You use quite a lot of GS to make a mold and use quite a bit to make the copied elements. Also, you will not be able to copy the finest details. Most of the time molds will be relatively rough.
But anyway, let's get on with it. As you can see I used a piece of sprue to limit the base area as I don't really need that big. Ideally I'd fill it all with GS and that'd make for a best mold. However I'm running low on it right now and I'm tight with money, so it will look a bit differently. As you can see here I'm checking if the piece fits in there:

Now, make quite a large ammoun of green stuff and put it onto the base.

Now the very important part. Use a brush to cover the entire piece with cooking oil. It will prevent it from sticking onto the putty and ruinging your mold when you will be take the piece out.
 Now firmly press the piece onto the putty. It's is adviced to first press the more detailed part in.

Now, since this mold will actually be two sided, use the blunt end of the brush to make holes which will act as guides, so that one it's all done the two pieces will fit the way they're supposed to. Also now is the time to make sure the mold is tightly adjected to the object.

Since this particular mold is drying now, I can't show you the last step, but it's simple. Lubricate the entire thing, both the piece and half of the mold with cooking oil and then slap another piece of green stuff onto it, so that it covers it entirely. Press firmly to make sure it attaches the way it should and takes as much details as possible.
And that's it for today. The next part will cover weathering and wearing out the veterans' armour. Meanwhile I'm back to working on infantry squad, psykers and differential equations. I'll post up some progress on the first, some previews on the second soon, but I won't torture you with the third!
Thanks for reading!
Read more!


